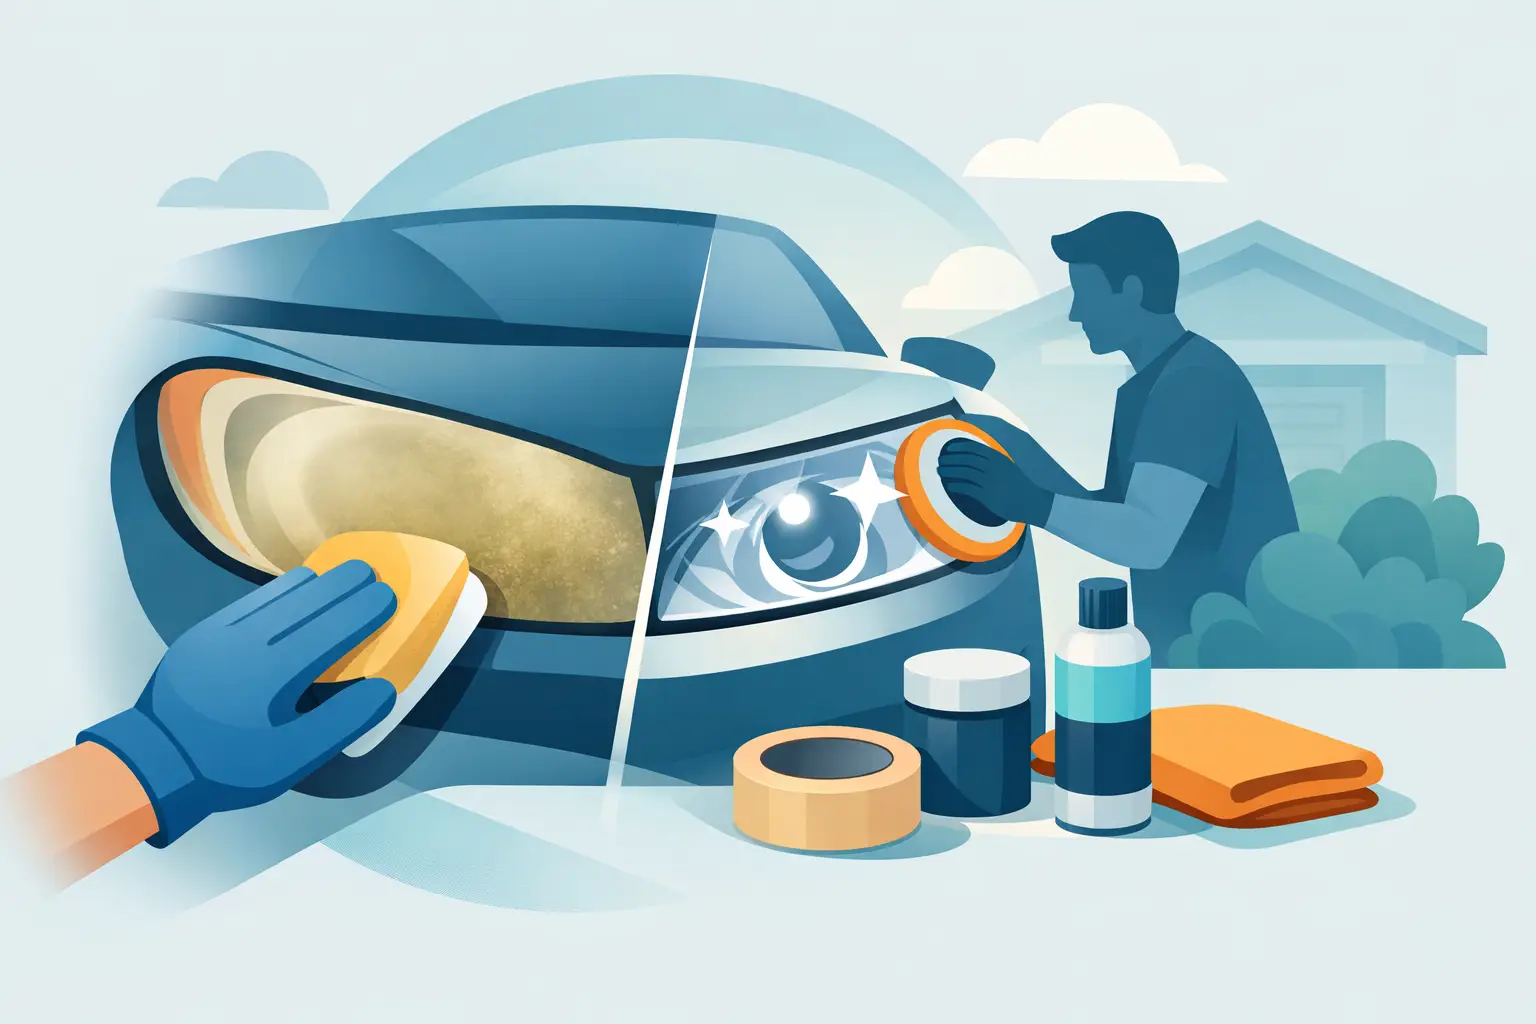
Cloudy headlights can make an otherwise clean BMW, classic Mustang, Tesla, or daily driver look neglected fast. More importantly, that hazy yellow layer cuts light output when you need it most. Learning how to restore faded headlights is one of the highest-value DIY exterior upgrades you can make for a modest spend and an afternoon in the driveway.
The key is not simply making the lens look clear for a few days. A good restoration removes damaged plastic, polishes the surface evenly, and adds UV protection so your work lasts. Skip that final protection step and the haze can return surprisingly quickly.
Why Headlights Fade in the First Place
Most modern headlight lenses are polycarbonate plastic, not glass. They are lightweight, impact-resistant, and shaped for modern vehicle designs, but sunlight is hard on them. UV exposure gradually breaks down the factory protective coating. Heat, road grit, car-wash brushes, salt, and chemical residue make the damage worse.
At first, the lens may look slightly dull. Later it turns yellow, develops a chalky film, or shows visible cracking. That haze scatters the beam instead of sending it cleanly down the road. Your bulbs may still work perfectly, but the light reaching the pavement can be noticeably weaker.
A restoration is a smart move when the cloudiness is on the outside of the lens. If moisture, dirt, or a milky film is trapped inside the housing, polishing the exterior will not solve it. In that case, inspect the rear caps, vents, seals, and housing for damage before spending money on a kit.
Choose the Right Headlight Restoration Method
There is no single best method for every lens. The right choice depends on how far the oxidation has progressed, how much time you have, and how long you want the result to last.
A basic cleaner or restoration compound works well on light haze. It is the fastest option and requires minimal equipment, but it may not cut through heavy yellowing. A complete restoration kit usually includes abrasive pads, polish, and a protectant. It offers better value for most vehicle owners because the components are designed to work together.
For deeply faded headlights, wet sanding followed by compound, polish, and a UV sealant produces the clearest result. It takes more patience, and poor technique can leave sanding marks, but it is often the better alternative to buying replacement assemblies. Replacement makes sense if the lens is cracked, warped from heat, leaking water, or damaged internally.
When comparing restoration kits, look beyond the sale price. Check whether the kit includes coarse and fine abrasives, masking tape, a final polishing step, and UV protection. A low-cost kit without a durable sealant can become a repeat purchase rather than a true fix.
What You Need Before You Start
Set aside a dry day with moderate temperatures. Avoid working in direct hot sun, which can dry compounds too fast and make them harder to control. Wash the front of the vehicle first, then gather your supplies:
- Automotive soap, water, and clean microfiber towels
- Automotive masking tape to protect paint, trim, and chrome
- A restoration kit or wet/dry sandpaper in multiple grits
- Plastic polish or cutting compound and a foam applicator or drill pad
- A UV protectant, clear-coat sealant, or coating supplied by the kit
For a heavily oxidized lens, nitrile gloves and safety glasses are worth using. You are working close to painted panels, and sanding residue can be irritating. Keep a spray bottle of clean water nearby if you are wet sanding.
How to Restore Faded Headlights Step by Step
Clean and inspect the lens
Wash both headlight lenses with automotive soap, then dry them completely. Do not polish over road film, bugs, or gritty debris. Those contaminants can create extra scratches while you work.
Look at the lens from several angles. If it feels rough and looks yellow or frosted, exterior oxidation is the likely problem. If the outer surface is smooth but the haze appears behind it, stop here and investigate the housing instead.
Tape the surrounding paint carefully
Run painter’s or automotive masking tape around every edge of the headlight. Use two layers near sharp body lines or painted bumper corners. This takes only a few minutes and can save you from turning a headlight project into a touch-up paint project.
Do not rely on a steady hand alone. Even a hand-polishing pad can scuff paint, while a drill attachment can damage trim quickly if it catches an edge.
Remove the damaged outer layer
For light oxidation, start with the compound or pad provided in your kit. Work in small, controlled circles with even pressure. Wipe the area clean frequently so you can see whether the haze is lifting instead of guessing through residue.
For heavy oxidation, wet sanding is usually more effective. Start with the least aggressive grit recommended for the lens condition, often around 1000 grit. Keep the paper and lens wet, sand in one direction, and use gentle, even strokes. The lens will look uniformly dull while sanding. That is normal because you are leveling the damaged surface.
Move to progressively finer grits, changing direction as you go. For example, sand horizontally with one grit and vertically with the next. This makes it easier to spot when the previous sanding marks have been removed. Do not jump from a very coarse grit directly to polish, or you may spend a long time chasing visible scratches.
Polish until the lens turns clear
After the finest sanding step, apply plastic polish or compound with a foam applicator, microfiber pad, or low-speed drill pad. Keep the pad moving and use light pressure. Too much speed creates heat, and excess heat can haze plastic or damage an aging lens.
Work one headlight at a time. Wipe away residue with a clean microfiber towel and inspect the lens before doing another pass. The clarity should improve in stages. If you still see a consistent pattern of sanding scratches, return to the appropriate finer grit rather than adding more polish indefinitely.
Seal the lens against UV damage
This is the step that separates a quick cosmetic improvement from a restoration worth doing. Freshly polished polycarbonate has lost its damaged top layer, but it also needs a new barrier against sunlight.
Apply the UV sealant, coating wipe, or clear protective product exactly as directed. Some products cure in minutes, while others need several hours away from rain, washing, and direct sunlight. If your chosen kit does not include protection, add a dedicated headlight UV coating instead of treating wax as a long-term substitute.
Avoid touching the lens while the coating flashes or cures. A coating that dries unevenly can look streaky, and fixing it may require another polishing pass.
Common Mistakes That Shorten the Results
Toothpaste, bug spray, and other viral shortcuts can make a lens appear better briefly because they contain mild abrasives or solvents. They are not a dependable restoration system, and some can damage plastic, trim, or paint. If you care about the finish on a premium vehicle or a well-kept classic, use products intended for automotive lenses.
Another common mistake is skipping grit levels to save time. Deep sanding marks do not disappear by wishful polishing. Use a gradual abrasive progression and inspect your work between stages.
Finally, do not assume a brighter bulb will compensate for a faded lens. LED upgrades, halogen replacements, and premium bulbs can be worthwhile, but a cloudy lens still scatters their output. Restore the lens first, then evaluate whether your current bulbs are delivering the light you want.
Keep Restored Headlights Clear Longer
Wash the lenses with the same care you give painted panels. Use pH-balanced car soap, clean microfiber towels, and gentle pressure. Harsh cleaners and dirty towels can wear down protective coatings sooner than expected.
Reapply a headlight-specific UV protectant as recommended by the product directions, especially if the car lives outdoors. Garage-kept vehicles in northern states may need less frequent maintenance than daily drivers parked outside in intense Arizona, Florida, or California sun. It depends on exposure, climate, and how durable the final coating is.
Check your headlights before fall and winter driving season, when dark commutes and wet roads make visibility more demanding. Clear lenses improve the look of the front end, but the real payoff is seeing road edges, signs, and hazards with more confidence. A small weekend detailing job can be one of the most practical upgrades on your vehicle.